The Ultimate Guide to the Blowout Taper Design Haircut
You more than likely have seen the blowout taper design on Instagram or TikTok in the name of inspiration on hair. It is smooth, edgy and very in at the moment. This is a type that fuses volume in the top, and clean and faded sides, which is the ideal blend of retro and modern precision.
The blowout taper is unique in the sense that it can be used in almost every hair type. You may be straight, with wavy or curly hair, this cut looks better than your natural flow can, and the ends are trimmed. It is stylish enough to wear to school, work or a night out. And the additional design aspect gives you the ability to fully customize and add lines or patterns making the appearance a unique one. We are going to deconstruct in this guide what this haircut actually is and how barbers can have that perfect finish. You will also know about the certain clipper guards, the length required on top and how to blend the back to get a smooth transition. At the end, you will be well informed on what you should be asking during your next appointment.
What is a Blowout Taper Design?
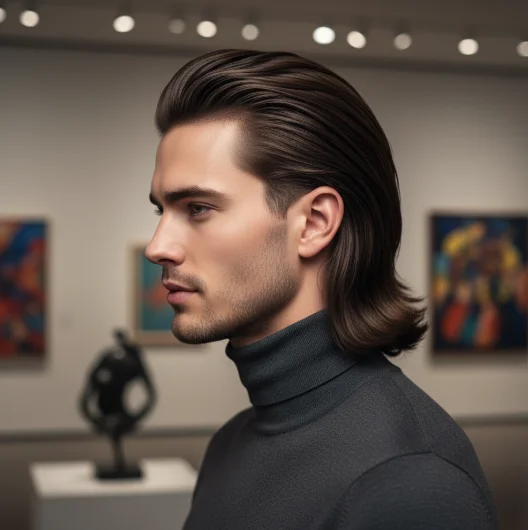
The blowout taper design is a particular style of men haircut that is centered around volume and sharp fade. The upward part of the styling is called a blowout. The hair is normally blown-up and backwards to give volume and movement. It appears full and thick, and tends to look similar to the trending styles of the 90s but with a smoother finish.
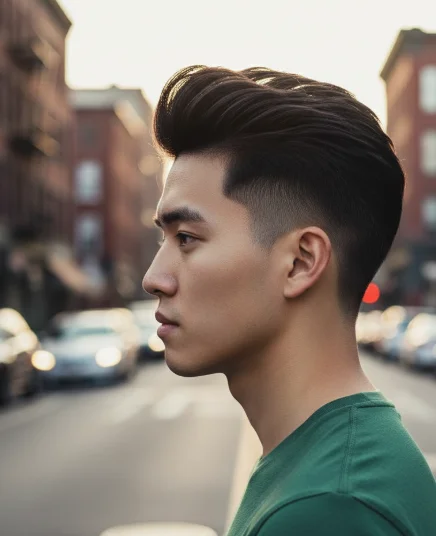
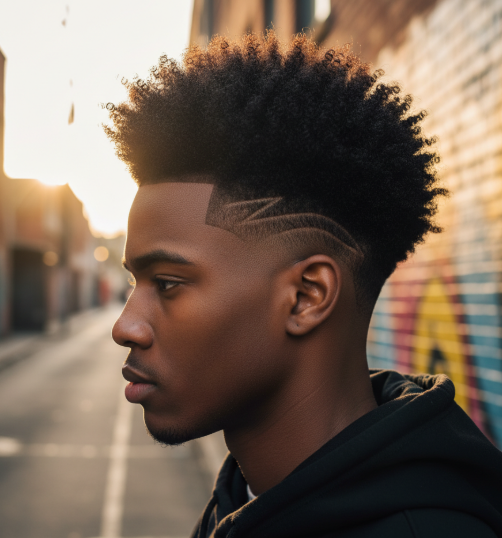
The sides and back are referred to as the taper part. This is unlike a traditional fade, which may be high on the head of the head, but the taper is focused at the sideburns and the neckline. This leaves behind some hair behind the ears resulting in a particular outline. The fade is weak although sharp and usually fades away into the skin at the very edges. Lastly, the creative touch is done by the design. This is where your hairdresser removes the grey part with a razor or trimmers to cut designs on the hair. Typical designs are plain slashes, lightning bolts or geometric figures. The mixture of large volume on the top, low fade on the sides, and custom design offers the balanced and eye-catching image, which is both classic and edgy.
The Step-by-Step Cutting Process
The taper of a perfect blowout needs to be systematic. An experienced barber does not simply begin to cut; s/he has a particular map to follow in order to make the fade indistinct and the top fits the sides perfectly. This process normally begins by mass removal and concludes with styling intricacies. To start with, the barber moisturizes the hair and part it at the top. This will be to keep the long hair out of the way as they work on the sides. They will have a bigger clipper guard to clear the bulk of the ears and the neck. This is a precursor of the taper. Thereafter, they develop a guideline at the base of the sidelines of the sideburns and neckline. This is the minimal point of the fade. Thence, the barber proceeds to work his way up. They replace them with shorter guards, and flicking out the clipper, they make the hair flow together smoothly. They take care of the c-cup region around the ear to ensure that the edges are sharp. Once the sides are faded, they go to the top. They cut them with a scissor in order to add texture. Lastly, they blow-dry hair to give volume and cut in the pattern with a trimmer razor or straight razor.
Clipper Guards for the Sides
The trick to clean taper is in the clipper guards. The correct size is used to give the fade a smooth appearance and not choppy. In the case of a typical blowout taper, the barbers tend to apply a certain sequence of guards in order to get that blurry gradient effect.
The majority of barbers begin the fading with either a three or four guard to de-bulk the sides. This makes the hair long enough to be flattened and short enough to appear presentable. They change shorter guards as they proceed near the ears and the neckline. The taper is normally stepped to a #1 or even a #0 (skin) at the lowest point.
A #1.5 guard or a #0.5 guard is essential, regarding the transition area. These half-sizes are useful to make the lines between the long and short parts blurred. This is to ensure a gradual transition in the color of the dark hair at the top of the sideburn to the light skin at the bottom. Should you desire a skin taper, the barber will shave or cut the hair at the lowest possible spot to get it all off.
Ideal Length for the Top
The blowout taper has to have a considerable amount of length at the top. The lack of sufficiently long hair will cause you to be unable to achieve the volume that makes the look of the blowout. The length will be determined by the texture of your hair, but there are general tips that should be followed in order to achieve the best outcome.
To have straight or wavy hair, you should have an average of 3 to 4 inches of your hair on the top. This makes it possible to push the hair back and with a hairdryer. In case it is too short it will not flow back but spike up. Other men want to wear it much longer, maybe 5 or 6 inches, to be more dramatically windswept.
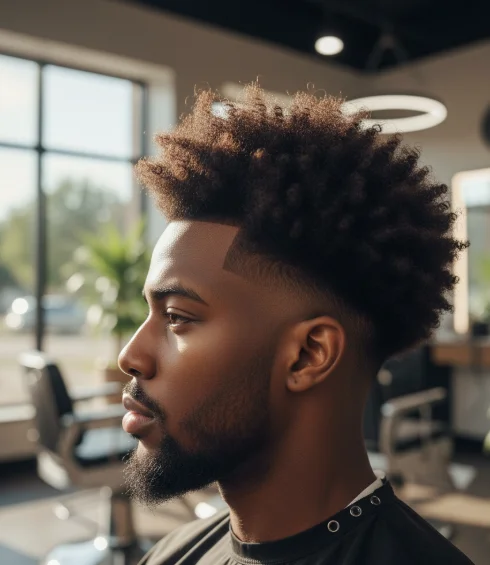
In case of curly or coily hair, the length appears different as a result of contraction. You may have to have 4 to 5 inches of extended hair to get the preferred shape. When it is dry or slightly wet, the barber will cut the curly hair in order to determine how the curly hair will fall naturally. This is to ensure that there is sufficient weight and length that would enable the hair to pile up in a nice way and not to appear messy or unkempt.
Blending the Back
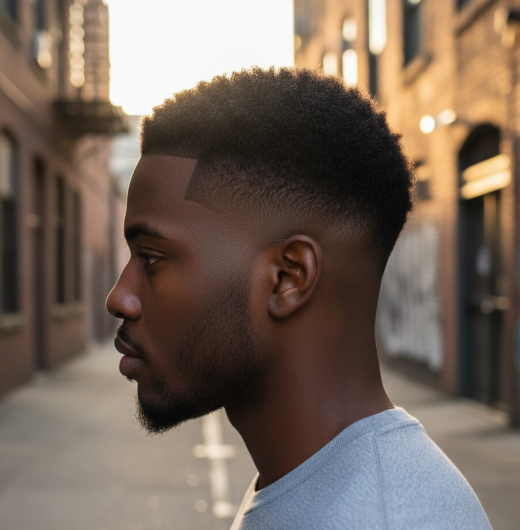
The rear of a blow out taper is as important as the sides. This is where the volume on top joins the neckline and a poor combination may destroy the whole figure. The taper at the back is normally a low taper i.e. the taper remains near the neck. Barbers begin by making a curved or straight line at the back of the neck.
The hair below this line is clean shaved. On the top, they cause the fading. Their progression is identical to that of the sides, starting with skin (or #0) to a #3 or a #4. Its fade must be spread farther apart with an increase in height on the head.
The worst is the “occipital bone”–the bump at the back of your skull. There is a lot of bulk/weight above this bone that is provided by a blowout taper. The barber weaves the longer bulk of hair on the neckline into the shorter one. They also have a trick known as clipper over comb wherein they flatten any thick lines. This makes the back profile appear round and full making the blown-out top to be complemented instead of flattened.
The Final Look and Styling
After cutting, the last style makes the blowout taper design a reality. The outcome ought to be a contrast of the sharp edges with the dirty, worn edges and the top being voluminous and textured. The shape that has been cut off in the taper provides the little extra flair.
In order to do this at home, one should start with damp hair. Use a pre-styler or mousse to put grip on. Apply round brush and hairdryer that is medium heat. Dry the hair up and back to make the roots lift. This forms the blow out effect. After making the hair dry and big, complete it with a styling product. A styling powder or a matte pomade is the best. The products maintain the shape without greasiness and weight of the hair. Separate the strands with your fingers and underline the texture. When you have a design at the side, get the hair swept away so that the marks remain clear and distinct. Blowout Taper design.